In this part I will show how to define the repository and controller Java classes for our Pet class.
This part assumes you have completed Part 3 of this series of articles.
In the previous part we defined a Pet class and made it suitable to become a database table. We now need a repository class that forms the data access mechanism. In the com.example.petsystem.pet package create a new Java interface called PetRepository having the following code:
package com.example.petsystem.pet;

import org.springframework.data.jpa.repository.JpaRepository;
import org.springframework.stereotype.Repository;

@Repository
public interface PetRepository extends JpaRepository<Pet, Long> {

}
The interface extends JpaRepository with two qualifiers: Pet, being the entity class this repository is for, and Long, being the primary key type.
The JpaRepository interface contains a number of pre-built methods we can make use of, such as findAll() to return a collection of our entities, and save() to save an entity to the database. The framework takes care of the underlying code. We can optionally define additional methods in PetRepository if we need to query the database in specific ways, but this goes beyond the scope of this introductory guide.
We now need a controller class that handles user interaction such as requesting a specific URL path. Start by defining a new Java class called PetController inside the com.example.petsyste.pet package:
package com.example.petsystem.pet;

import org.springframework.beans.factory.annotation.Autowired;
import org.springframework.stereotype.Controller;

@Controller
public class PetController {

    private PetRepository petRepository;

    @Autowired
    public PetController(PetRepository petRepository) {
        this.petRepository = petRepository;
    }


}
The @Autowired annotation tells the framework that the constructor is managed by the framework so we don't need to call the constructor ourselves.
The constructor initialises a PetRepository object that we can make use of in subsequent methods.
We need to handle when the user browses to the home page, the relative path of which will be / (forward slash). Add the following method to PetController:
    @GetMapping
    public String index(Model model) {
        return "index";
    }
You need to import Model from org.springframework.ui.
@GetMapping("/") tells the framework to respond to a HTTP GET request to the home page.
I named the method index so it matches that of the HTML file, though this is not a requirement.
The Model argument is provided by the framework and allows us to interface between the view and the controller. We will make use of this later.
The final piece needed to establish the database table is to define the necessary settings in the application.properties file. Edit this file (which you should still have open from an earlier stage) to be as follows:
spring.application.name=Pet System

# connection to H2 database
spring.h2.console.enabled=true
spring.h2.console.path=/h2-console

# datasource settings
spring.datasource.name=m250pets
spring.datasource.generate-unique-name=false
spring.datasource.username=
spring.datasource.password=
With the above in place, run the project and then browse to the following location in your browser:
localhost:8080
This should show our basic home page:

You can browse to see the H2 console by going to:
localhost:8080/h2-console
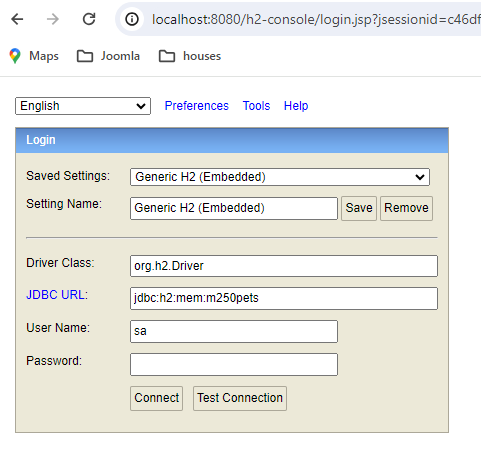
Ensure the settings are as above and click Connect:
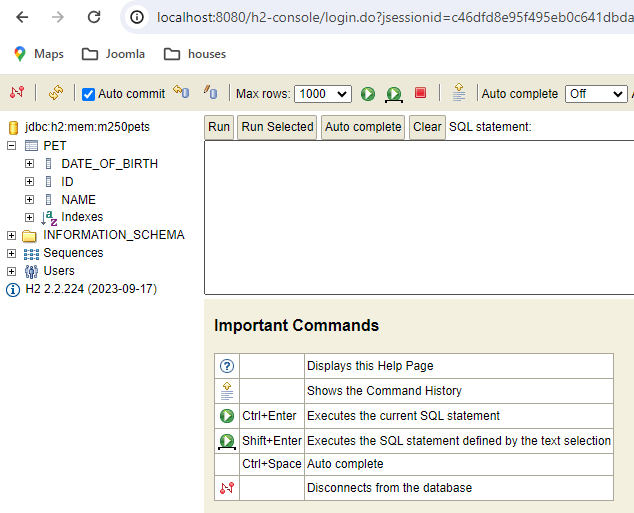
We can see that the framework has created a database table called PET with our three defined fields.
In Part 5 I will develop a new page to allow the user to add pets to the database.
Comments