Defining a selection list of zookeepers
The left-hand section of the screen will show a scrollable list of all of the zoo keepers working at the zoo, and the natural component to use for this is a JList nested inside a JScrollPane. The JList class is a UI list-box component capable of listing objects, and which allows one or more items to be selected. It gets as its list of items the objects returned from a ListModel object (being any class you write that implements the ListModel interface). In object-oriented parlance a model is a data source, which will generally be a collection of objects, possibly retrieved from a relational database although it can in fact be any source of data you like. Models are deliberately defined as separate objects from the UI components that use them so that each can be developed and modified independently, and the UI component will query the model to obtain the data for its display.
The ZooKeeperList class
Create this class in virtualzoo.ui as follows:
package virtualzoo.ui;

import virtualzoo.core.*;
import java.util.*;
import javax.swing.*;

public class ZooKeeperList extends JList {

    private ZooKeeperListModel model;

    public ZooKeeperList() {
        setSelectionMode(ListSelectionModel.SINGLE_SELECTION);
        model = new ZooKeeperListModel();
        setModel(model);
    }


    private class ZooKeeperListModel extends DefaultListModel {

        private ZooAdministrator admin;
        private List<ZooKeeper> zooKeepers;

        public ZooKeeperListModel() {
            admin = ZooAdministrator.getInstance();
            loadModel();
        }

        private void loadModel() {
            zooKeepers =
                    new ArrayList<ZooKeeper>(admin.getZooKeepers());
            Collections.sort(zooKeepers);
            fireContentsChanged(this, 0, zooKeepers.size() - 1);
        }

        @Override
        public Object getElementAt(int index) {
            return zooKeepers.get(index);
        }

        @Override
        public int getSize() {
            return zooKeepers.size();
        }
    }
}
The class extends JList so it can provide a list of objects.
It defines an inner class called ZooKeeperListModel to serve as the model (i.e., source of data to be shown in the list). This extends the Java supplied DefaultListModel class which provides useful background services, meaning all the inner class needs to do is:
- Obtain the collection of zookeepers, which is performed in the
loadModel()method. They are placed into anArrayListso that the items in the collection are indexed by their position, which is required bygetElementAt(). The items are sorted into their natural ordering, which is by the zookeeper's name. ThefireContentsChanged()method, which is inherited fromDefaultListModel, tells theJListcomponent that it needs to refresh its display of the items between the specified indexes - Override the
getElementAt()method which provides the index as its argument. An index of 0 means the first item in the list, an index of 1 means the second item, etc. The object at the index location in theArrayListis obtained and returned - Override the
getSize()method which provides the total number of objects in the model, simply obtained via thesize()method on the collection - Note how in the
ZooKeeperListconstructor an instance of the model is created and then assigned to the list using thesetModel()method. The list is also set to only allow selection of a single item at a time
An editor panel for a zookeeper
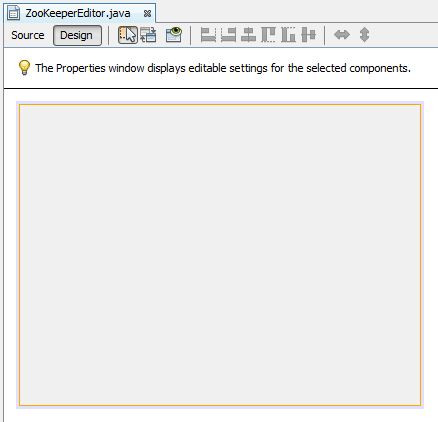
You will now develop a graphical class called ZooKeeperEditor using the NetBeans GUI builder, that will be capable of displaying and enabling the editing of a ZooKeeper object's attributes. In NetBeans, right-click on the virtualzoo.ui package node and select New | JPanel Form..., entering ZooKeeperEditor as the Class Name. This should result in a blank form being shown on screen:
By default, NetBeans forms are set to use a NetBeans provided layout called FreeDesign, which allows you to place components wherever you like. Above the blank form you will see two tabs called Source and Design, with the latter currently selected. If you click on the Source tab it will show the generated Java source code for the panel. Switch back into Design mode and notice the Palette window that appears on the right of the screen:
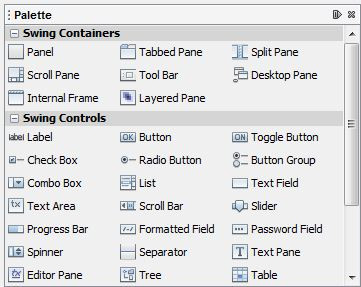
You can use the palette to select your required components. Under the Swing Controls section click and drag Label (which is an instance of JLabel) to the blank panel so that it looks as follows:

Now drag a Text Field across to appear to the right of the label, and then use the handles that appear around the component to stretch it to the right so that your screen looks like this:
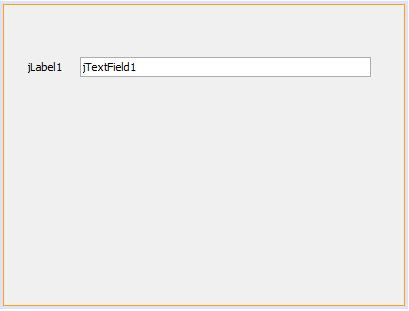
Right-click on the jLabel1 component and select Edit Text. Use the in-place editor to change it to Name: and press Enter. Now right-click again and select Change Variable Name... setting it to nameLabel.
Now use the same techniques to rename jTextField1 to nameField and set its text to blank.
In the bottom left corner if the NetBeans frame you should see the Navigator window which shows a hierarchical view of the structure of your components as you add them to the form:

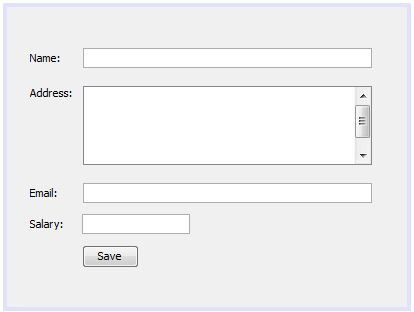
Place a new label underneath the first, rename it to addressLabel and set its text to Address: Under the Swing Containers section of the palette drag a Scroll Pane next to the address label, sizing it to appear as follows:

There is no need to rename the scroll pane component. Drag a Text Area on top of the scroll pane and you will notice it take up all the space inside of it. Rename the text area as addressArea.
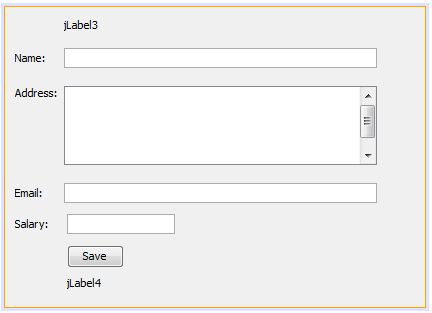
Now drag across two more labels and two more text fields to represent the email address and salary, naming the text fields emailField and salaryField respectively[1] and blanking their text. Underneath these drag a Button, changing its text to Save and its variable name to saveButton. At this stage the screen should look like this:
The Navigator window should show this:

Underneath the palette there is the Properties window which shows the available properties of the currently selected component. For example, if you click in nameField it will look like below:
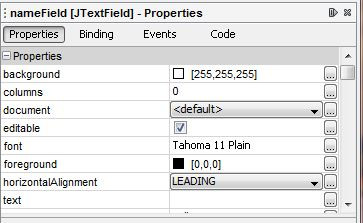
If you wanted to prevent the user from being able to type into the field you could un-check the editable checkbox, for example. Here, you do need this field to be editable you should ensure the checkbox remains checked.
Click the Source tab and scroll down to near the bottom of the Java source. You will see all the instance variable declarations inside a shaded area that does not allow any editing.
If you click the Design tab again the third icon to its right is Preview Design, which provides an indication of how the panel will appear when in use.
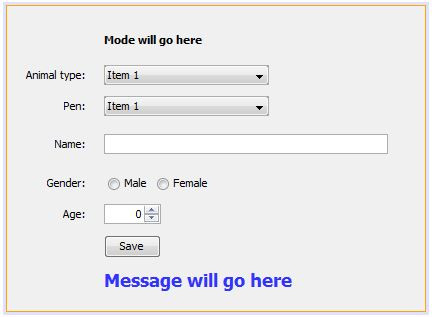
There are in fact two more labels that need to be placed on the form, one above the existing components and one below. The top label will inform the user whether they are adding or editing a zookeeper's details, and the bottom label will display a message confirming when the details have been saved. Drag two labels, one above and one below the current components so your form looks like this:
Click in each of the new labels in turn and stretch them to the right to align with the longer text fields. Now rename jLabel3 as modeLabel and set its text to Mode will go here. Underneath the palette you will see the Properties window showing the attributes of the currently selected component. Ensure modeLabel is still selected (by clicking on it on the form if necessary) and look at the Properties window

Locate the font attribute and notice that it is currently set to Tahoma 11 Plain. Click the little button to the right of this that contains three dots in order to open the customiser for this attribute. In this case you should see the font customiser in which you can change the Font Style from Plain to Bold:

Click OK.
Now rename jLabel4 as messageLabel and set its text to Message will go here. Use the Properties window to change its font to bold and also have a size of 18. Also find the Foreground attribute in the Properties window and click the dots button to open the colour customiser:
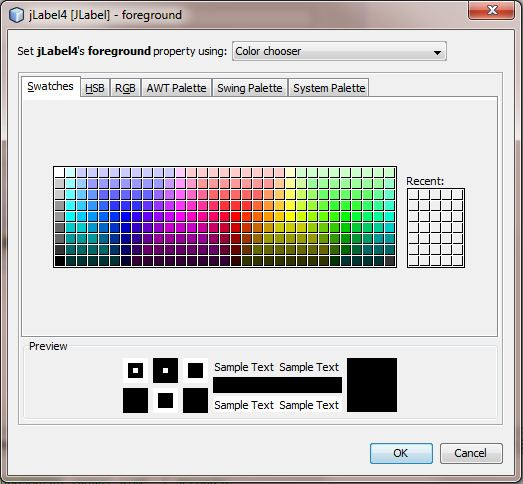
Use your mouse to click on one of the shades of blue in the grid of colours, then click OK.
The form should now look similar to this:
In the Navigator window the entries for modeLabel and messageLabel appear last in the list because they were the last to be added. Because modeLabel is actually the top component on the form you may prefer it to be listed first in the Navigator too. You can do this by right clicking its node and selecting Move Up, repeating the process until it appears just above nameLabel.
Switch into source editing mode by clicking the Source button.
You should add imports for the core package and the Swing components:
import javax.swing.*;
import virtualzoo.core.*;
For ZooKeeperEditor to be any use it needs to know if it should be adding a new zookeeper or editing an existing one. To this end, define a new instance variable to reference a ZooKeeper object:
private ZooKeeper zooKeeper;
The instance variables generated by NetBeans (for the graphical components) appear at the bottom of the source file in an un-editable area. It is suggested that you define the above instance variable in the same position you have used in your other developed classes, i.e., just before the constructor, to distinguish it from the auto-generated variables.
If the zooKeeper instance variable is null, then you will take this to mean that this panel should add a new zookeeper using the values entered into the form fields. Conversely, if the variable is not null then it will reference the ZooKeeper object that should be used to pre-fill the entry fields to be potentially updated.
Define a new method in ZooKeeperEditor called clearZooKeeper() to handle the first of the above two scenarios:
void clearZooKeeper() {
    zooKeeper = null;
    nameField.setText("");
    addressArea.setText("");
    emailField.setText("");
    salaryField.setText("");
    modeLabel.setText("Add New Zoo Keeper");
    messageLabel.setText("");
}
- The
zooKeeperinstance variable is set tonulland each of the text entry fields is emptied. ThemodeLabelis set to inform the user that they are adding a new zookeeper
Define another method called setZooKeeper() which accepts a ZooKeeper object as an argument representing the one that needs editing:
void setZooKeeper(ZooKeeper zooKeeper) {
    this.zooKeeper = zooKeeper;
    nameField.setText(zooKeeper.getName());
    addressArea.setText(zooKeeper.getAddress());
    emailField.setText(zooKeeper.getEmail().toString());
    salaryField.setText(zooKeeper.getSalary().toPlainString());
    modeLabel.setText("Change Zoo Keeper Details");
    messageLabel.setText("");
}
- The
zooKeeperinstance variable is set to the argument and each of the text entry fields is pre-filled with the existing values gleaned from the supplied zookeeper. ThemodeLabelis set to inform the user that they are changing an existing zookeeper - Note the use of
toString()to get theStringrepresentation of theEmailobject, and the use oftoPlainString()for theStringrepresentation of theBigDecimalobject. WhileBigDecimaldoes have atoString()method, it might return the value in scientific notation, which would not be suitable for a monetary value
By default, you want the editor to be in "add" mode when first instantiated, so add a call to clearZooKeeper() inside the constructor:
public ZooKeeperEditor() {
    initComponents();
    clearZooKeeper();
}
Later, you will develop another class which will call either clearZooKeeper() or setZooKeeper() as appropriate.
You can now enter some code to handle the Save button being clicked. Click on the Design option to see the form, and then double-click the Save button. This will take you back into the source mode from which you will see an auto-generated method called saveButtonActionPerformed() as follows:
private void saveButonActionPerformed(java.awt.event.ActionEvent evt) {
    // TODO add your handling code here:
}
Inside the above method you can enter the code to be executed whenever the Save button is clicked by the user. You should enter the following code:
private void saveButonActionPerformed(java.awt.event.ActionEvent evt) {
    ZooAdministrator admin = ZooAdministrator.getInstance();

    if (zooKeeper == null) {
        // Adding a new zoo keeper
        admin.createZooKeeper(nameField.getText(),
                              addressArea.getText(),
                              emailField.getText(),
				              salaryField.getText());
        messageLabel.setText("New zoo keeper added");
    } else {
        // Changing an existing zoo keeper
        admin.changeZooKeeper(zooKeeper,
				    nameField.getText(),
				    addressArea.getText(),
				    emailField.getText(),
				    salaryField.getText());
        messageLabel.setText("Zoo keeper details changed");
    }
}
- A reference to the
ZooAdministratorsingleton object is firstly obtained, since you need to invoke either itscreateZooKeeper()orchangeZooKeeper()method - A test is made to see whether the
zooKeeperinstance variable isnullin order to know whether the zookeeper is being added or changed
In the next lesson you will see how to validate form input.
Comments